
Integrate ThinApp Package Services with VMware Identity Manager
Configure the ThinApp Sync to bring in the ThinApp packages
After enabling ThinApp application integration we can schedule how often we want to sync ThinApp repository with Identity Manager. To do this from Identity Manager click Catalog > Manage Desktop application.

ThinApp Application management
In new open window we can modify frequency and time when synchronization will happen. Depending on our requirements we can choose – Once per Week – Once per Day – Every Hour – Manually. As well we can specify time and day if we choose to sync on weekly or daily basis.

ThinApp Sync settings
Assign ThinApp packages to a user/group
From Application Catalog click ThinApp application to assign user or group. Click the Entitlements under application info and click Add group or Add user. Choosing Browse will list all groups/user which are available select one to add and choose deployment type – User Activated or Automatic click Save.

ThinApp entitlements

Group selection

User selection
Configure file shares and permissions
The ThinApp packages must reside on a network share ThinApp package repository. The network share must be accessible using a Uniform Naming Convention (UNC) path from each system running the VMware Identity Manager Desktop application used to access the ThinApp packages. For example, a share named ThinAppRepo on a host named server is accessible using the UNC path \\server\appshare. The fully qualified hostname of the network share folder must be resolvable from VMware Identity Manager.
Install components needed for ThinApp integration
We need to have installed VMware Identity Manager Desktop Client for Windows. Login to Identity Manager website with user account and choose Download.

User portal
Clicking Download button we will be redirected to My VMware portal where we can download installation file.

Desktop Client download
We need administrative right to install Desktop client. Installation is very straight forward.

Welcome screen

Accept License agreement

Default settings

Ready to install
After installation there will be new icon in action menu at task bar. Right click and choose Connect to server type Identity Manager server FQND and click ok to connect. We will be ask to choose domain or Local User and specify user name and password.

Identity Manager server address

Select domain to login

User Name and Password
After succesful log in we can open Identity Web Portal and we can see all application which we are entitlement to use. First time opening ThinApp application we will see information that Identity Manager Desktop must be installed, click Open App to start application.
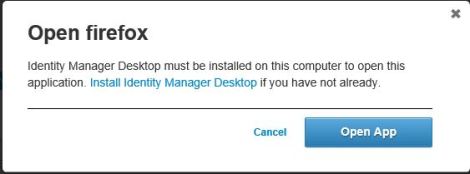
Information window
Click here to read other entries in the series VCAP6 -DTM

Pingback: VCAP6-Desktop and Mobility Deployment Study Guide – Virtual Elementary·